Where can Projex Shockmat be Used?
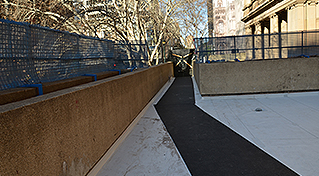
Projex Shockmat has many varied installations including as a non-slip and/or protection walkway over waterproof membranes.
It is commonly used by Builders & Tradesmen as temporary protection of finished surfaces (tiled/timber floors etc) as well as providing significant reduction in noise transfer through floors. It can be use for the following areas:
- Protective Walkway Over Waterproof Membranes including under pad supports & concrete toppings
- Noise Control Under Timber Flooring & Tiles
- Temporary Protection of Finished Surfaces
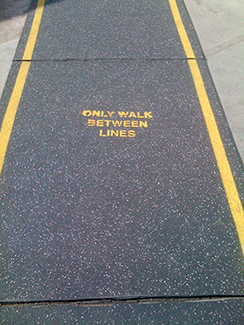
- Pathways
- Ice rink Walkways
- Garden Beds
- On truck or utility trays
- Under Machinery
- Industrial Matting
- Tanks
- Coolrooms
- Food Storage Facilities
Projex Shockmat can be installed directly on the following surfaces:
- Bitumen Membranes
- Acrylic membranes
- Polyurethanes
- PVC sheet membranes
- Polyurea membranes
- Butyl-rubber membranes
- Concrete Substrates
- Timber Substrates
- Steel Substrates
- CFC Sheeting
Projex Shockmat Installation Procedures for Roof Membrane or Internal Floor
Step 1: Substrates Preparation
Wolfin Membrane – Thoroughly clean the membrane of all dust dirt and oils. Generally wash down with detergent solution and rinse off.
Concrete Floors – The floors must be sound, clean, completely dust free and smooth. Repair damage or indentations as necessary with appropriate repair mortar materials.
Timber Floors – The floor must be sound, rot free, clean, dry and with all nails firm and flush. Thoroughly clean and check the surface for loose fixings, irregularities, splintering and ‘cupping’. Where necessary sand the surface smooth.
Other Membranes – Identify the membrane type to ensure selection of the correct preparation method and adhesive.
Step 2: Expansion Allowance (External Use)
Where laid exposed externally, each Projex Shockmat roll should be cut into three pieces along its length. Each piece will measure approximately 1250 x 2000. Lay the resulting ‘tiles’ 5 to 10mm apart all round to allow for expansion and contraction.
Where laid on membrane DO NOT cut the rolls on or within the membrane area.
Where exposed to view or available for traffic:
(a): trim each ‘tile’ if necessary to ensure regularity of joint.
(b): fill the open joints with an appropriate flexible urethane.
Step 3: Adhesive
An adhesive tested to bond the Shockmat to Wolfin, concrete and plywood surfaces is Holdfast SG 226. Before choosing an adhesive make sure that it is compatible, water resistant and (where applied externally) heat resistant up to at least 60 degrees Celsius.
If using Holdfast SG226, apply the adhesive at a rate of 1 to 1.5 litres per square metre; depending on substrate condition and porosity; all in accordance with the adhesive manufacturer’s recommendations. Allow to tack before placing the Shockmat.
Step 4: “Curl” Elimination
The Shockmat is supplied in rolls and may show a temporary tendency to “curl” at the ends. Where feasible, unroll the Shockmat (curl downwards) and allow to relax for a day or so.
In any case, lay the Shockmat so any curl is downward and apply weights (bricks) to hold it flat until the adhesive has sufficiently cured.
Projex Shockmat Installation Procedures for Internal Applications
Step 1: Noise Control Attenuation:
The Shockmat Sound Control System is suitable for all cases where a definite need for control of impact sound exists. Some examples are under hard floor finishes such as tiles, marble, stone, parquetry or timber strip flooring in multi-storey residential blocks or housing. Refer to the Technical Data Sheet for IIC rating and BCA Approvals.
Step 2: External Applications
Similar systems are available for exterior tiled decks over living spaces onto Wolfin and Cosmofin membranes. The system can also be installed onto other membrane types – contact Projex Group for advice in respect to compatability, adhesives, thermal expansion control, etc.
Step 3: Adhesives
Where an adhesive is shown by name, it s a recommendation only, based on experience. The purchaser is responsible to select adhesives suitable for the substrate, duty and environmental conditions applicable to the job.
Step 4: Tiling
Where tiles dimensions exceed 300 x 300 or large pavers are used, and the substrate is sufficiently sound, the FC sheeting can be deleted.
